


Upgrading your RV to solar power and lithium batteries for full off-grid camping

Upgrading your RV to solar power and lithium batteries for full off-grid camping is a fantastic way to gain independence from shore power or generators. This guide will walk you through the process using Victron components and Expion360 lithium batteries (either the 132Ah or 162Ah models), ensuring reliability, durability, and safety—core principles echoed in the Expion360 manuals. The system must be designed so your solar panels generate enough power to meet your daily energy needs and fully charge your batteries, while your battery bank has the capacity to support your load. Let’s dive into the steps.
Step 1: Calculate Your Daily Energy Consumption (Load)
To create a reliable off-grid system, start by determining your daily power usage, or "load," in watt-hours (Wh). List all RV components—lights, fridge, water pump, fans, chargers, etc.—and calculate their energy draw.
-
How to Calculate Load:
- Multiply each device’s power rating (in watts) by its daily usage (in hours).
- Example: A 60W fridge running 24 hours = 60W × 24h = 1,440Wh. A 10W LED light used for 5 hours = 10W × 5h = 50Wh.
- Sum all watt-hours for your total daily consumption.
Sample RV load:
- Fridge: 60W × 24h = 1,440Wh
- LED lights: 10W × 5h = 50Wh
- Water pump: 50W × 1h = 50Wh
- Phone chargers: 10W × 3h = 30Wh
- Total = 1,570Wh per day
This is your baseline. Your solar panels need to produce at least 1,570Wh daily, and your batteries must store enough to cover this, especially during low-sun periods.
Step 2: Determine Battery Capacity
Your battery bank must store sufficient energy to meet your daily load, with extra capacity for inefficiencies or cloudy days. Expion360’s LiFePO4 batteries offer 100% usable capacity, high energy density, and rugged reliability—ideal for off-grid life.
-
Battery Options:
- Expion360 12V 132Ah: 132Ah × 12V = 1,584Wh
- Expion360 12V 162Ah: 162Ah × 12V = 1,944Wh
-
Sizing Your Bank:
- For 1,570Wh daily, one 132Ah battery is slightly under, requiring daytime solar support. One 162Ah battery just covers it.
- For resilience, use multiple batteries. Two 132Ah batteries in parallel = 3,168Wh total, or two 162Ah batteries = 3,888Wh total, offering 1-2 days of autonomy.
- Recommendation: Two Expion360 162Ah batteries provide ample capacity for your load and a buffer for off-grid reliability, aligning with Expion360’s focus on scalable, dependable power.
Step 3: Size Your Solar Array
Your solar panels must generate enough energy to cover your 1,570Wh daily load and recharge your batteries fully in about 5-6 hours of peak sunlight. Victron’s efficient components make this straightforward.
-
Solar Output Calculation:
- Factor in 85% system efficiency (losses from wiring, controller, etc.).
- Adjusted need: 1,570Wh ÷ 0.85 = ~1,847Wh daily from panels.
- With 5 peak sun hours: 1,847Wh ÷ 5h = ~370W of solar panels minimum.
-
Charging the Batteries:
- Two 162Ah batteries = 3,888Wh total. To charge from 0% to 100% in 5 hours: 3,888Wh ÷ 5h = ~778W of solar panels.
- For practical use (e.g., 20% to 100%), less is needed, but oversizing ensures flexibility.
- Recommendation: 800W of solar panels (e.g., four 200W panels) covers your load and recharges your 3,888Wh battery bank in ~5 hours, even with inefficiencies.
Step 4: Select Victron Components
Victron’s smart, reliable technology pairs perfectly with Expion360 batteries. Here’s the updated system with a Cerbo GX and GX Touch 70:
-
Solar Charge Controller:
- Victron SmartSolar MPPT 150/70 (70A output). Supports up to 150V input and 70A to the batteries. For 800W at 12V: 800W ÷ 12V = 66.7A, fitting within spec. Bluetooth monitoring via VictronConnect adds convenience.
-
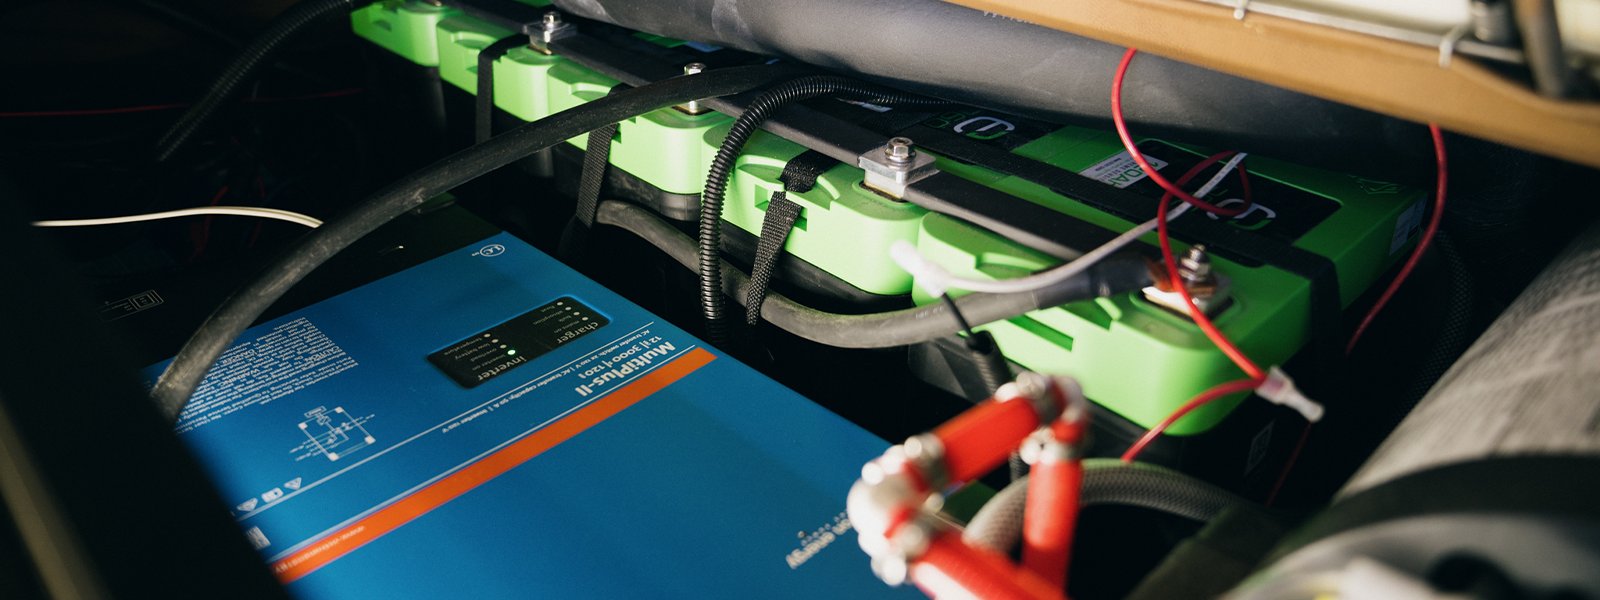
Inverter/Charger:
- Victron MultiPlus 12/3000/120-50. Converts 12V DC to 120V AC (3,000W) for big loads (e.g., microwave, A/C) and charges batteries at 120A from shore power or a generator if needed.
-
System Monitoring:
- Victron Cerbo GX + GX Touch 70. The Cerbo GX is the brain, connecting all Victron devices (MPPT, MultiPlus, etc.) for real-time data on solar input, battery status, and load. The Touch 70, a 7-inch touchscreen, provides an intuitive interface to monitor and control your system, replacing the BMV-712 with a centralized hub.
-
Battery Protection:
- Victron Smart BatteryProtect 12/24V-100A. Safeguards your Expion360 batteries from over-discharge, enhancing longevity.
-
DC-DC Charger (Optional):
- Victron Orion-Tr Smart 12/12-30 (30A). Charges your house batteries from the RV alternator while driving, supplementing solar power.
Step 5: Wiring and Installation
- Panels: Mount 800W of solar panels on your RV roof, wired in series/parallel to stay under 150V for the MPPT 150/70.
- Batteries: Connect two Expion360 162Ah batteries in parallel (positive to positive, negative to negative) for 324Ah at 12V. Use 4/0 AWG cables and Expion360’s durable terminal pads.
- Victron Setup: Wire panels to the MPPT controller, then to the battery bank via a busbar. Connect the MultiPlus and Cerbo GX (with Touch 70) for full integration.
- Safety: Install fuses (e.g., 100A near batteries, 70A at the MPPT) and prioritize Expion360’s secure, vibration-resistant connections.
Step 6: Verify and Optimize
- Confirm your 800W solar array produces at least 1,570Wh daily (more in summer, less in winter—adjust usage as needed).
- Verify your 3,499Wh usable battery capacity supports your load overnight and during low-sun periods.
- Use the Cerbo GX and Touch 70 to monitor solar production, battery health, and consumption, fine-tuning your system on the go.
Final System
- Batteries: 2× Expion360 12V 162Ah (3,499Wh usable)
- Solar: 800W panels with Victron SmartSolar MPPT 150/70
- Inverter: Victron MultiPlus 12/3000/120-50
- Monitor: Victron Cerbo GX + GX Touch 70
- Extras: Smart BatteryProtect, Orion-Tr Smart (optional)
This setup reflects Expion360’s commitment to safe, efficient, and reliable power, enhanced by Victron’s advanced control via the Cerbo GX and Touch 70. You’ll enjoy off-grid camping with a system built to perform in any environment, keeping you powered and in charge.